Preparing the Uterine Cytology Slide
A very useful, rapid and easy first step diagnostic prior to breeding a mare is to prepare and read a uterine cytology slide. Minimal equipment is required, much of which a breeder may be likely to already possess. We discuss the significance and importance of the cytology smear in our article about why to perform a cytology smear in conjunction with a uterine culture.
Sampling Equipment
If using a swabbing device (as opposed to a low-volume lavage), best results are achieved with a cytology brush rather than a culturette (cotton-tip swab), Kozdrowski et al finding a comparison rate of 54% and 38% respectively indicating endometritis mares owing to better cell-harvesting ability of the brush[1]. Other authors have published similar findings[2][3].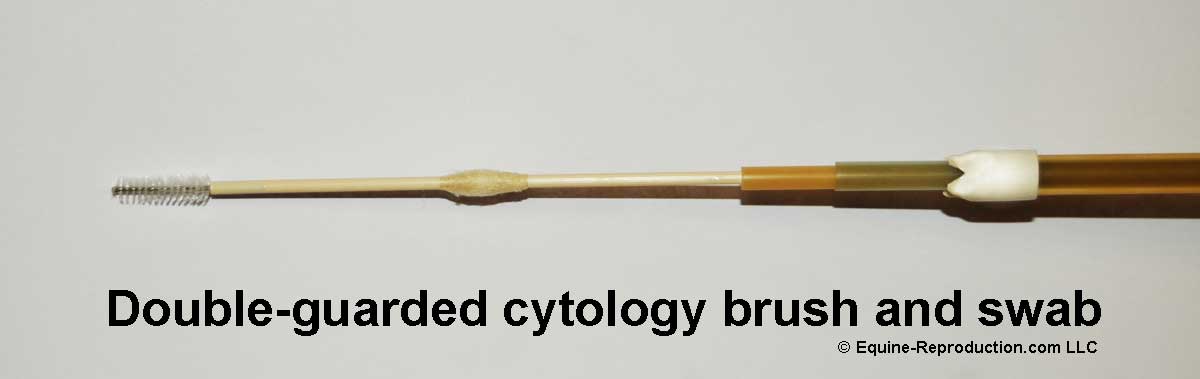
Sample Harvesting Technique
The process of taking the swab is almost identical to performing an insemination in the initial stages. Preparation is the same (pre-washing the perineal region); use of a sterile or “clean” rectal sleeve and sterile lubricant is identical; and then introduction of the swabbing device through the cervix is performed in the same manner as with the insemination pipette. The swabbing device should ideally be a double-guarded unit, with an outer and inner guard protecting the actual swab/brush. This reduces the possibility of a contaminated sample. The inner guard is then extended beyond the outer guard, and then the culturette/brush is extended beyond them both and allowed to remain in contact with the endometrium for around 30 seconds. Gently moving the swab/brush from one location to another close by may harvest a slight diversity of cells. If using a cotton-tipped culturette, it is essential that the device not be twisted during harvesting, as this may cause the cotton swab to come unwound and be left in the uterus. Once the sample has been harvested, the reverse process is performed – swab device withdrawn into inner guard, then inner guard into outer guard, and then the entire unit removed from the mare.
Uterine Cytology Stain Preparation
Once the sample has been taken, minimal delay is desirable prior to creating the smear. This is to avoid the sample drying out. The swab or brush is rolled on a microscope slide. There are frosted “cytology slides” available, however a regular microscope slide is usually perfectly adequate. If using a cotton swab culturette, moistening the swab with a drop or two of water prior to it being rolled on the slide can be advantageous to create a better quality smear. Note that the water does not need to be sterile, as a cytology slide is not looking for bacteria. Some people like to then smear the sample on the slide using a second microscope slide, however when using the swab or brush this is typically not necessary, as the depth of the sample will not be great.
The slide is now air-dried. Placing it on a slide warmer or exposing it to another mild heat source can speed the process.
Uterine Cytology Slide Staining
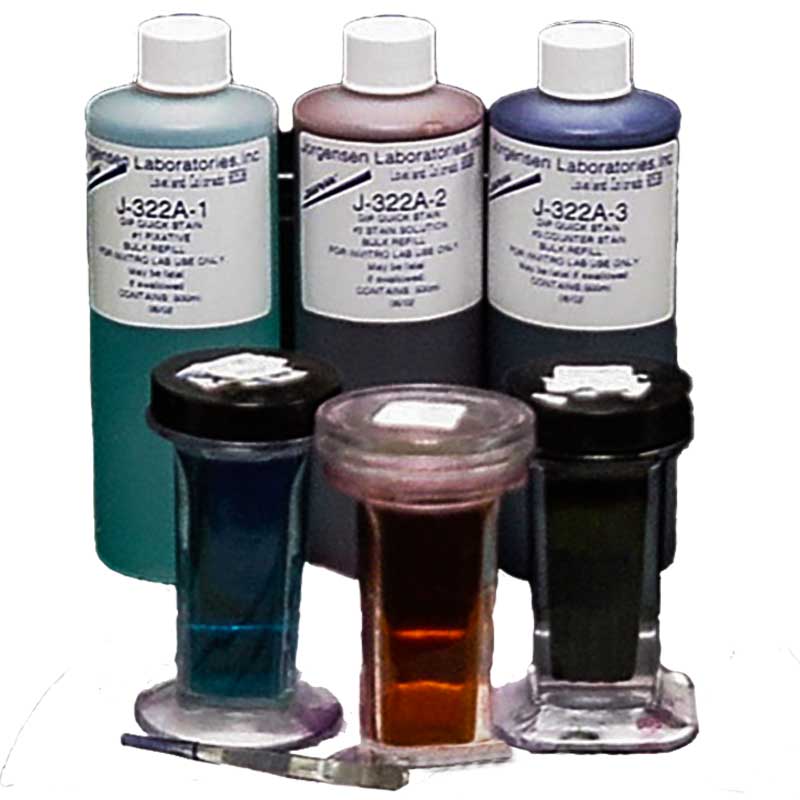
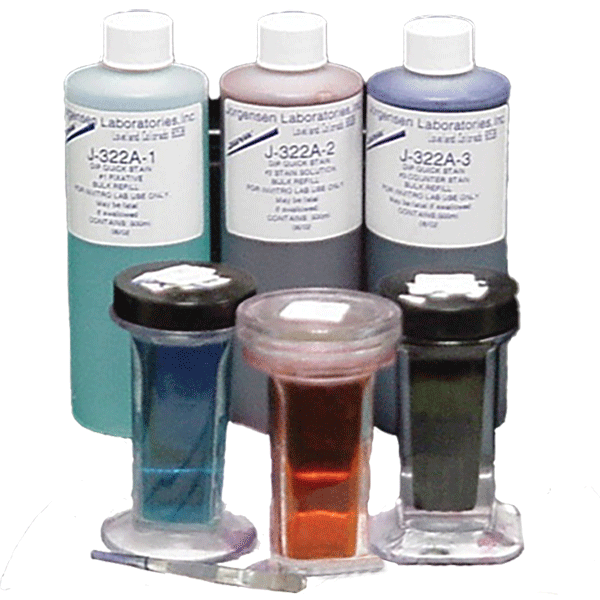
“DiffQuick” hematology stain kit (Jorgensen)
A differential hematology stain is used to stain the cells. “DiffQuick” is a brand name of such a stain and is a Romanowsky stain variant, however there are other non-brand stains available that are equally effective. These can be bought as kits, and will usually contain three different liquids which will be different colors. The first is a fixative, and the next two – Eosin Y and Methylene blue – will be stains which affect different portions of the cell. People have different staining techniques as far as number and duration of dips in the liquids is concerned. We typically teach a “3, 4, 5” or “4, 5, 6” routine, as people seem to remember sequences better than an individual number. The key however is to expose the sample to the stain adequately, but not too much, so as one experiments, one may develop one’s own methods. Each of the dips we mention would be approximately one-second in duration, starting with the fixative, then the Eosin (red/orange), then the Methylene (blue) stains. There is no need to worry about transfer between the Conklin jars (or stain containers), as again, we are not looking at bacteria, so “contamination” is not a concern with a cytology stain. One may wish to encourage the excess stain off the end of the slide onto paper towel in between each part of the process, being careful to avoid disturbing the sample. After staining in the final stain, one should very carefully rinse off the excess stain under a very light stream of water – use of a (gentle) squirt bottle is preferable to the tap, however if the tap must be used, make sure it’s not too forceful a stream, or one will wash off the sample.
Once again at this stage, the sample on the slide is air-dried.
Uterine Cytology Slide Evaluation
The stained slide is now viewed at 100x and 400x magnification using a standard bright-light microscope. The neophyte should take care to ensure that the sample is completely dry prior to viewing, as accidentally introducing the objective lens of the microscope to the still-wet sample by mistake results in a frustrating need to remove stain from the lens!
The most common cell to be seen will be – we hope – standard epithelial cells from the endometrium. These will tend to be somewhat elongated in shape (they are actually “columnar”) and uniformly stained throughout. They may appear in “rafts” where there are clumps of these cells adjacent to each other. If we only see these cells, this is good, as there is therefore no evidence of inflammatory response.

Stained endometrial smear showing inflammatory cells (neutrophils, arrowed) and endometrial cells.
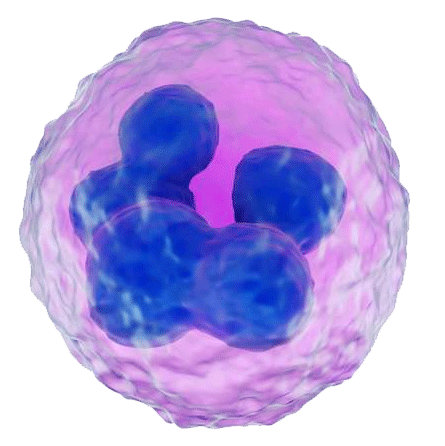
Polymorphonucleocyte – aka “PMN” or “neutrophil”
The most commonly identified cells which we don’t want to see are polymorphonucleocytes, or “PMNs” – also known as “neutrophils”. These are small almost round – although irregularly so – cells with a darker-stained and irregular-shaped nucleus. This nucleus is “multi-lobulated” and sometimes described as being shaped like a bow-tie, although it may have more than two lobules. The presence of this cell indicates that there is an active inflammatory response going on in the uterus. The next step therefore would be to identify the cause. In a mare not-yet bred, some sort of pathogenic presence is most likely, although it may also be a foreign object such as a swab device which has broken off during a previous sampling which has not been removed. Most commonly however, it’s going to be a pathogen, and this should be identified by preparation of a culture of the sample (qv). Mares which are sampled for some reason within 24 hours after being bred – or in some cases undergoing other uterine treatments such as lavage or infusion – will be likely to display inflammatory cells, which are unlikely to be an indicator of a problem, unless they fail to resolve over the ensuing 24-48 hours.

The small “bunches of grapes” are yeast cells!
Other cells may also be identified, which can be suggestive of a potential for other issues. These may include eosinophils, which are commonly associated with mares which suffer from pneumouterus (“wind sucker mares”), which may benefit from placement of a Caslick’s procedure; degenerative cells such as neutrophils in a state of decay may be suggestive of longer-seated inflammatory issues; urine crystals may be seen in mares which suffer from urovagina (“urine pooling”); and usefully, in rare instances, yeast or fungus may be seen. We say “usefully” in this last instance, as a regular bacterial culture which is typically grown for a 24-48 hour period may not demonstrate yeast or fungal growth in the reported results, as it can take up to 7 days of culture to grow yeast or fungus. The capsules themselves though may stain and be very obviously visible during a cytology smear evaluation.
Culturing the Sample
It must be remembered that the sampling device used to prepare the cytology stain in the above-described method is no longer suitable as a source for a culture sample. This is because we have potentially contaminated the device – and therefore the sample – with bacteria from other sources (remember, the cytology smear is not looking for bacterial presence, so we have not had to concern ourselves about avoiding contamination once the cytology sample is taken). One way to prepare for the possibility of the need for a sample suitable for culture is to perform two sequential swabs. The first can make use of a regular double-guarded uterine culturette swabbing device, and then the second the cytology brush. One can actually place the initial device into the uterus, and then after withdrawing the inner guard and swab of the first device back into the outer guard, remove those completely while leaving the outer guard in situ. One then introduces the second inner guard and brush through the outer guard which is still in place. This avoids the necessity of invading the vagina and uterus twice and reduces the chance of accidental contamination of the uterine environment. An alternative to using the two-device method is to use a single device which combines a brush and a culturette. If using this method however, a sterile slide and great care must be used to create the cytology smear, or else contamination of the culture sample may occur. If in-house cultures are being prepared, then it is possible to smear the culture plate first and then prepare the cytology smear, so in that case a single sampling device can be used. A third possibility exists with using a second short (non-uterine) sterile swab to take a swab sample from the brush or swab used to harvest from the uterus, prior to it being smeared on the cytology slide. This does increase the risk of contaminants, as well as possibly impacting the number and quality of cells available for the cytology smear, however it is worthy of mention as an alternative.
A Commonly-Asked Question
One question frequently asked is “when is it best to take a sample for cytology and culture?” The best time is during estrus. At that stage, the cervix is relaxed making the process mechanically easier, and the uterine immune function is elevated meaning if there is inflammatory cell and pathogenic presence identified, it is likely the mare herself has been unable to take care of it. Additionally, should a contaminating organism be accidentally introduced into the uterus during the sampling process, as the local immune function is elevated, there is less chance of it becoming a long-term issue. Having said that, one needs to be aware that a mare is in estrus only about one week out of three, so if the mare owner has no idea where the mare is in her cycle, the attending veterinarian is often faced with a request to swab the mare during diestrus. A refusal to do so, coupled with presentation of a bill for “no service performed” is unlikely to make a client happy, so often is it necessary to perform the swab regardless of the lack of estrus. This does not present a major issue in itself, although the cervix will (should) be tightly closed. There is a valid argument to be made that if any pathogenic presence is found in the uterus during diestrus, that is indicative of an ongoing problem, as the cervix is closed, so there should be no potential for contamination. Invasion of the diestrus uterus for sampling is usually followed immediately by treatment with Prostaglandin F2α or an analogue thereof to promote onset of estrus and the associated elevation of the uterine immune function. This practice will reduce the chance of the mare developing a uterine pathogenic problem created as a result of the diestrus sampling process. It is important to consider that there are potential causes of failure of prostaglandin to create a return to estrus, so monitoring of the mare is recommended.
Summary
Creation and reading of a uterine cytology slide smear is a rapid and useful tool to determine if the mare has a pathogenic activity in the uterus. With the exception of just a couple of pathogens – notably Pseudomonas aeruginosa and e-coli – the uterus is likely to mount an inflammatory response, manifested by increased neutrophil presence, against any pathogens. If such a presence (neutrophils) is identified, then clearly further diagnostics are called for prior to breeding the mare. In the absence of such inflammatory cell presence, the vast majority of mares will be be determined to be “clean” and breeding can commence. As the entire process of creating and reading a uterine swab cytology smear will take less than about 15 minutes, this tool can be invaluable for rapid diagnostics to determine suitability of breeding of a mare just presented unexpectedly in estrus. As we note in our extended article about the importance of the uterine cytology smear, performing only a swab culture is considerably less accurate at identifying those mares with a bacterial endometritis compared to the uterine cytology. If one diagnostic is to be performed rather than the other, the balance of benefit is clearly in the favor of the cytology smear in most cases.
References:
1: Kozdrowski R, Gumienna J, Sikora M, Andrzejewski K, Nowak M. 2013. Comparison of the Cytology Brush and Cotton Swab in the Cytological Evaluation of the Endometrium in Mares with Regard to Fertility. JEVS 33;11:1008-1011 – https://www.sciencedirect.com/science/article/abs/pii/S0737080613000932
2: Cocchia N, Paciello O, Auletta L, Uccello V, Silvestro L, Mallardo K, Paraggio G, Pasolini MP. 2012. Comparison of the cytobrush, cottonswab, and low-volume uterine flush techniques to evaluate endometrial cytology for diagnosing endometritis in chronically infertile mares. Theriogenology 1;77(1):89-98 – https://pubmed.ncbi.nlm.nih.gov/21855980/
3: Buczkowska J, Kozdrowski R, Nowak M, Raś A, Staroniewicz Z, Siemieniuch MJ. 2014. Comparison of the biopsy and cytobrush techniques for diagnosis of subclinical endometritis in mares. Reprod Biol Endocrinol 12:27 – https://rbej.biomedcentral.com/articles/10.1186/1477-7827-12-27
© 2023, Equine-Reproduction.com, LLC
Use of article permitted only upon receipt of required permission and with necessary accreditation.
Please contact us for further details of article use requirements. Other conditions may apply.